الأربعاء، 28 مارس 2012

Network Assignment

Now it's time to send the email.

In windows, go to start=>run=>cmd
Once the command line is opened write the following: telnet localhost 2301
>telnet smtp.gmail.com 25
you should see the following:
220 mx.google.com ESMTP f14sm1400408wbe.2

we send a hello message:
helo google
250 mx.google.com at your service
ehlo google
250-mx.google.com at your service, [212.28.228.49]
250-SIZE 35651584
250-8BITMIME
250-AUTH LOGIN PLAIN XOAUTH
250 ENHANCEDSTATUSCODES

Then the authentication request:
 AUTH LOGIN
334 VXNlcm5hbWU6

Now we have to authenticate by using our gmail address and password.
However since this is an encrypted session, we're gonna have to send the email and password encrypted in base64. To encrypt your email and password, you can use a program or an online website to encrypt it (search on google for: base64 online encryption).
For example the sentence "my email address" in base64 will become: bXkgZW1haWwgYWRkcmVzcw==
and the word "password" will become: cGFzc3dvcmQ=

Now you should have your email address and password encrypted in base64, go back to the command line and write your base64 email first, (I will use "my email address" as my email address and "password" as my password for this example):
bXkgZW1haWwgYWRkcmVzcw==
334 UGFzc3dvcmQ6

Enter your password:
cGFzc3dvcmQ=
235 2.7.0 Accepted

Enter your email:
MAIL FROM:<etienne.rached@gmail.com>
250 2.1.0 OK x23sm1104292weq.10

Enter the recipient email (I'll email myself for testing):
RCPT TO:<etienne.rached@gmail.com>
250 2.1.5 OK x23sm1104292weq.10
 
Now comes the message part:
DATA
354  Go ahead x23sm1104292weq.10
From: Etienne <etienne.rached@gmail.com>
To: Meeeeeeee <etienne.rached@gmail.com>
Subject: Testing email from telnet
This is the body

Adding more lines to the body message.
Finish the DATA with a dot:
.
250 2.0.0 OK 1288307376 x23sm1104292weq.10


And quit:

QUIT
221 2.0.0 closing connection x23sm1104292weq.10
Connection to host lost.

The email should now be sent and you can find it in your "sent mail" in your gmail.


Using Telnet with stunnel is very easy, I will try and show how to receive an email with pop3 using telnet, and how to send an email using TLS in my future posts.

Hope you enjoyed this one :)
this is assignment just convert it to your programming language

الاثنين، 26 مارس 2012

مميزات بيثون

بسيطة
بيثون لغة بسيطة لأبعد الحدود. قراءة برنامج بيثون جيد يكاد يشبه قراءة اللغة الإنكليزية على الرغم من أنها إنجليزية صارمة!هذه الطبيعة الشبه رمزية (pseudo-code) لبيثون أحد أعظم أسرار قوتها. فتتيح لك التركيز على حل المشكلة لا اللغة نفسها.
سهلة التعلم
كما سترون، بيثون سهلة للغاية لتبدأ بها في تعلم البرمجة. بيثون تحتوي تراكيب سهلة بشكل غير معتاد، كما سبق ذكره.
حرة ومفتوحة المصدر
بيثون هي مثال على البرمجيات الحرة مفتوحة المصدر. بعبارات بسيطة، يمكنك بحرية توزيع نسخ من هذه البرمجيات، وقراءة كود المصدر، و القيام ببعض التغييرات عليها واستخدام أجزاء منها في برمجيات حرة جديدة، وأنت تعرف أنه يمكنك أن تفعل هذه الأشياء. البرمجيات الحرية تقوم على مبدأ المجتمع الذي يتشارك في المعرفة. هذا واحد من أسباب كون بيثون جيدة جدا - لأنه قد تم إنشاؤها وتحسينها بشكل مستمر من خلال المجتمع الذي يريد فقط أن يرى بيثون أفضل.
لغة برمجة عالية المستوى
عندما تكتب البرامج في بيثون، لا تحتاج للاهتمام بالتفاصيل دقيقة المستوى مثل إدارة الذاكرة التي يستخدمها برنامجك، إلخ.
محمولة
نظرا لطبيعتها كبرمجية مفتوحة المصدر، تم نقل بيثون إلى (أي تم جعلها تعمل على) العديد من المنصات. كل ما تكتبه من برامج بيثون يمكن أن يعمل على أي من هذه المنصات دون أن يتطلب ذلك أي تغييرات على الإطلاق إذا كنت دقيقا بما فيه الكفاية لتجنب أي خصائص تعتمد على نظام بعينه.
يمكنك استخدام بيثون على لينكس، ويندوز، فري بي‌إس‌دي، ماكينتوش، سولاريس، OS/2، Amiga، AROS، AS/400، BeOS، OS/390، z/OS، Palm OS، QNX، VMS، Psion، Acorn RISC OS، VxWorks، PlayStation، Sharp Zaurus، Windows CE وحتى الحاسوب الكفي.
مفسَّرة
هذا يتطلب شيئا من الشرح.
البرنامج المكتوب بلغة مصرّفة (compiled) مثل سي أو سي++ يتم تحويله من اللغة المصدر (سي أو سي++) إلى اللغة التي يتكلمها حاسوبك (كود ثنائي من أصفار وآحاد) باستخدام المصرّف مع مختلف الخيارات والتعليمات. عند تشغيلك البرنامج، يقوم الرابط/المحمّل (linker/loader) بنسخ البرنامج من القرص الصلب إلى الذاكرة ويبدأ في تشغيله.
بيثون -من ناحية أخرى- لا تحتاج التصريف إلى كود ثنائي. فقط شغل البرنامج مباشرة من الكود المصدر. داخليا، فإن بيثون يحول كود المصدر إلى شكل وسيط يسمى bytecode ثم يترجم هذا إلى اللغة الأصلية لجهازك، ثم يشغله. كل هذا يجعل من الأسهل بكثير استخدام بيثون حيث لست بحاجة للاهتمام بتصريف البرنامج، أو التأكد من صحة مكتبات الربط وتحميلها، الخ، الخ. وهذا أيضا يجعل برامج بيثون الخاصة بك أكثر محمولية، بحيث يمكنك مجرد نسخ برنامج بيثون الخاص بك إلى حاسوب آخر، وبعدها يعمل!
كائنية التوجه
تدعم بيثون البرمجة الإجرائية (procedure-oriented) وكذلك البرمجة الكائنية (object-oriented). في اللغات إجرائية التوجه، يتمحور البرنامج حول الإجراءات أو الدوال التي ليست سوى قطع من البرامج يمكن إعادة استخدامها. وفي اللغات كائنية التوجه، يتمحور البرنامج حول الكائنات (objects) التي تجمع بين البيانات والوظائف. ولبيثون طريقة قوية جدا ولكن تبسيطية لعمل البرمجة الكائنية خاصة عند مقارنتها باللغات الكبيرة مثل سي++ أو جافا.
قابلة للامتداد
إذا كنت في حاجة لجعل جزء حيوي من الكود يعمل سريعا جدا أو تريد إخفاء بعض الخوازميات، فيمكنك كتابة هذا الجزء من برنامجك بلغة سي أو سي++ وبعدها تستخدمه من برنامج بيثون الخاص بك.
قابلة للتضمين
يمكنك تضمين بيثون في برامج سي/سي++ لإعطاء قدرات ال'scripting' لمستخدمي برنامجك.
مكتبات شاملة
مكتبة بيثون القياسية مكتبة ضخمة حقا. تساعدك على عمل مختلف الأشياء العادية بما فيها التعابير النمطية (regular expressions)، توليد التوثيق، اختبار الوحدات، الخيوط (threading)، قواعد البيانات، متصفحات وب، CGI، ftp، بريد إلكتروني، XML، XML-RPC، HTML، ملفات WAV، التعمية، الواجهات الرسومية وغيرها من الأشياء التي تعتمد على النظام. تذكر، كل هذا متاح دائما أينما يثبت بيثون. وهذا ما يسمى فلسفة 'البطاريات مضمنة' في بيثون.
بجانب المكتبات القياسية توجد العديد من المكتبات المتنوعة الأخرى عالية الجودة مثل wxPython، و Twisted، و Python Imaging Library وغيرها الكثير.

الخلاصة

بيثون لغة مثيرة وقوية حقا. فهي مزيج من حسن الأداء والميزات التي تجعل كتابة برامج بيثون خليطا من السهولة والمتعة

الثلاثاء، 20 مارس 2012


1) صبور و ذكي و نشيط و يحب تعلم كل ما هو جديد .
2) أن يعرف اللغة الإنجليزية If u don't know it . Learn it أو لا يفكر بالهكر أو الهاكينج اذا لم يتكلم E بطلاقة.
3) يعرف خفايا الأجهزة و المواقع والإيميلات .
4) يعرف لغتين برمجة أو أكثر ومن أهم هذه اللغات:
-C & C++ .
-Java وهي من أهم اللغات .
- Perl وهي شبيهة بالجافا .
- Lisp جيدة .
- Python وهي لغة ممتازة وللمحترفين .

5) متواضع و لا يتفاخر على الذين أقل منه خبرة وعمر .
6) يحب المنافسة مع الاخرين .
7) ... لايبخل على غيره بالنصائح فقططط
8) ومن أهم صفة للهكر أن يكون عنده اسم مستعار دائم لا يتغير الا بحالات الطوارئ ومعناه Nick Name ومن صفات هذا الاسم الا يعبر عن شخصية صاحبه... فمثلا من سمى نفسه ((Sleepy)) أي بالعربي ((النعسان)) ليس من الضروري أن يكون دائم النعس والكسل بل هو إسم خارجي لا علاقة له .

9) أن يكون اجتماعي وله علاقات عديدة .
10) الهكر لا يأمن المسائلة القانونية مهما فعل ....
) أن يعرف أهم الشخصيات وأشهر الهكرز في العالم.
12) كمعلومة: أشهر هكر في العالم هو الأميركي : كيفين ميتنيك . Kevin Mitnick

السبت، 17 مارس 2012


python programming crash-course

Qtpython.com


Qtpython.com is sponsored by http://synapse-labs.com. The Aim of this blog is to teach the visitors of this site Python QT GUI development starting with the python programming crash-course by example which includes:
Then we will move on to PyQt Development which includes:

How to Configure Eclipse for Python

Rose-Hulman Institute of Technology -

Computer Science & Software Engineering

Python3 must be installed before the complete instillation can be completed. If you don't have Python installed you can install it using these directions

Install the PyDev plug-in for Eclipse

 
  1. Launch Eclipse
    1. Launch Eclipse. A screen like this should appear, where you can choose which workspace to open. (If not, go to File → Switch Workspace → Other )
    2.         Screenshots read 'Python 3.1', which is the old version. You will be installing Python 3.2.
    3. Browse the csse120 folder which you created when installing Eclipse. Select "Use this as the default and do not ask again".
      1. If you do, Eclipse will automatically use this workspace next time you open Eclipse. If you want to change the workspace later you can always go to File → Switch Workspace... to be sent back to the Workspace Launcher window.
    4. You should now see Eclipse's Welcome screen:
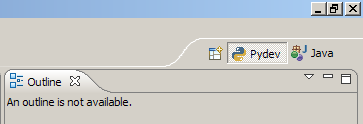
      Click on the arrow on the right to go to the workbench.
      This is where you'll do most of your work in Eclipse.
  2. Download PyDev from within Eclipse
    1. Go to Help → Install New Software
    2.  
    3. Enter http://pydev.org/updates in the Work with:  field.
    4. After several seconds, two options should appear. Select the PyDev for Eclipse option. Do not select the "PyDev Mylyn Integration" flag.

    5.  
    6. Click "Next" and "OK" to continue installing PyDev.
    7. Select "I accept the terms of the license agreement", then click "Finish". The installer will begin to download the plug-in.
    8. Note: When you see the Selection Needed dialog box, you must manually check the box before pressing okay. If you do not, it appears that the installation is continuing, but it is not. You must uninstall PyDev, then reinstall.
    9. A security warning may appear asking whether you trust the software being installed- click "ok", then ensure the correct items are selected and click yes. The instillation process will continue.
    10. When the installation is complete, you will be asked if you want to restart Eclipse. Select "Yes". You may see a Subclipse Usage  dialog, just uncheck the box and continue.
  3. Configure PyDev
    1. Python must be installed to configure PyDev.
    2. Go to Window → Preferences. In the Preferences window, expand PyDev and select Interpreter-Python.
    3. Click "New..." and type Python32 for the Interpreter name. For the Interpreter executable, browse to your copy of Python (C:\Program Files\Python32\python.exe), and press Open.

      Click "OK" and the  Selection Needed Window will appear.
    4. Select all but the PySrc and python32.zip and click OK as many times as necessary to exit the preferences. The default selection should be fine.
    5. The Interpreter is now set up so that the code you write can be interpreted for the computer to run. You are now ready to start running code.

Installing Eclipse Preferences for Python

  1. Download the Eclipse Preferences
    1. Unzip this Preferences for csse120 file, placing its sole unzipped file (EclipsePreference-2011-06.epf)  in any convenient location (your desktop, My Documents folder, etc).
  2. Import the Preferences
    1. Launch Eclipse.
      1. If Eclipse offers to Select a Workspace, browse to C:\EclipseWorkspace\csse120.
      2. If the csse 120 workspace does not appear automatically, choose File → Switch Workspace → Other, and click Next.
    2. Now you are ready to set the preferences for the workspace:
      1. Choose File → Import
      2. In the Import dialog box, select General → Preferences and click Next.
      3. When the Import Preferences dialog opens, select Browse and find the EclipsePreferences-2011-06.epf file that you unzipped and saved above.
      4. Back in the Import Preferences dialog, check Import All, then select Finish.
      5. As before, if the Subclipse Usage dialog makes an appearance, uncheck the box and continue.
      6. Confirm that the installation did not leave behind unintended files by checking if there is:
        1. random .eclipse folder anywhere, possibly in the folder immediately above My Documents.
        2. Any extra users (for example, the installer), in C:\Users
        3. Extra Eclipse workspaces anywhere except for the folders inside C:\EclipseWorkspaces.

Writing Your First Python Program

  1. Switch to the Python perspective
    1. Go to Window → Open Perspective → Other and choose PyDev, then click OK. If you look at the upper right corner you will see that the perspective has changed from "Java" to "PyDev".
    2. Perspectives are designed to have the most useful tools within reach for whatever task you are doing (for example writing Java code or writing Python code). If you look in the File→ New menu you will see that there are different options with the different perspective.
      PyDev Perspective
      Java Perspective
      As you can see, perspectives greatly affect the look of the Eclipse program.
  2. Create a new project
    1. Go to File → New → PyDev Project to start a wizard.
    2. In the next window that appears, enter the name of your project and select "python"  and 3.0"; as the type. Make sure "create default 'src' folder and add it to the pythonpath?" is selected. Click Finish.
    3. If you look at the upper left corner of the workspace (in the Package Explorer view), you should now see your newly created project with a "src" folder inside.
  3. Create a new module
    1. Select the project you just created and go to File → New → PyDev Module. This will launch a new PyDev Module Wizard where you should enter a name for your module and make sure it is in the right location. Leave the Package field blank and select Finish.
    2. Look in the Package Explorer view and you will see an icon of your new file inside the src folder, which Eclipse created when you made the new project before.
      The file should be opened in the open space in the center of the workspace-the Editor view. (If not, right click on the greeting.py icon and select Open.) You will see a tab with the name of your file.
  4. Write and run the program
    1. Here's a program to greet the world. Simply type print('Hello, World!') into the file. You may remove the default doc comment or leave it there; Python ignores it.
    2. Right click on the file and select Save (or press Ctrl+S) to save the file.
    3. Finally, choose the greeting.py icon, and go to Run → Run As → Python Run to run your program. (A quicker alternative is to right-click on the greeting.py icon, and select Run As → Python Run, or press Ctrl+F11.)
    4. Look at the bottom of your screen at the Console view and you will see the message you told the computer to print.
      Congratulations! You have written your first program with Python.

Configure PyDev for Productivity

  1. Add line numbers
    1. Add line numbers by right-clicking in the margin at the left side of the code view and click on Show Line Numbers
  2. Change the comment color to one you can read more easily
    1. Go to Window → Preferences. Open PyDev and select Editors (actually click on 'Editors', don't just expand it). In the Appearance Color Options dropdown menu, select Comments. Then change it to a brighter color (perhaps fuchsia?).
  3. Turn on Task view  to show TODO: items and add a CONSIDER: tag
    1. Go to Window → Show View → Tasks.
    2. Window → Preferences → PyDev → Task Tags, and add CONSIDER: to the end of the list.
    3. To get the task tags to show, run the program once, or select Project → Clean
دراسة: لينوكس الأكثر طلباً للتوظيف مجال تقنية المعلومات 81% من مدراء التوظيف قالوا بأن توظيف خبراء لينوكس هو أولوية في العام 2012،
كشف استطلاع أجرته كل من “لينوكس فاونديشن The Linux Foundation” وموقع “دايس Dice” الذي يعد الموقع الأكبر في العالم للتوظيف في مجال تقنية المعلومات بأن الخبرة في نظام التشغيل مفتوح المصدر “لينوكس” باتت الخبرة الأعلى طلباً لدى الشركات التقنية.
وشملت الدراسة أكثر من ألفي مدير توظيف لدى شركات كبرى ومتوسطة وصغرى، ولدى هيئات حكومية ووكالات التوظيف حول العالم. وتوصلت الدراسة إلى ثلاث نقاط رئيسية:
  • الطلب على الخبرة في لينوكس إلى ارتفاع، لكن العثور على الخبراء صعب، إذ بينت الدراسة بأن 81% ممن شملهم الاستطلاع قالوا بأن توظيف خبراء لينوكس هو أولوية في العام 2012، وقال 63% منهم بأنهم زادوا نسبة التوظيف في مجال لينوكس مقارنةً بالمجالات الأخرى. لكن 85% منهم قالوا بأن العثور على الخبرات المطلوبة ليس سهلاً، مما يجعل خبراء لينوكس من أكثر المطلوبين للتوظيف في 2012.
  • تبذل الشركات أموالاً كبيرة في سبيل جذب خبراء لينوكس والمحافظة على الخبراء الموجودين لديها، حيث يحصلون على المزيد من فرص العمل بدوام كامل وعلى رواتب وعلاوات أفضل. وفي الوقت الذي شهدت فيه الوظائف التقنية ارتفاعاً نسبته 2 بالمئة فقط في 2011، فإن رواتب خبراء لينوكس شهدت ارتفاعاً نسبته 5 بالمئة، وقفزة بنسبة 15 بالمئة في العلاوات. كما شهدت زيادة بنسبة 37 بالمئة من حيث المرونة في جدول العمل، و30 بالمئة من حيث برامج التدريب والحصول على شهادات.
  • مطوروا لينوكس من أصحاب الخبرة المتوسطة ومدراء الأنظمة هم الأكثر طلباً، حيث تبحث 67 بالمئة من الشركات عن مطورين لنظام لينوكس، و 55 بالمئة عن مدراء الانظمة من ذوي الخبرات المتفاوتة. وقال 75 بالمئة أنهم يبحثون عن خبراء لينوكس بخبرة تتراوح بين 3 إلى 5 سنوات.
وأشارت الدراسة بأن هذا الطلب المتزايد يأتي على حساب الخبرات التقنية الأخرى، حيث يتوقع 47% من مدراء التوظيف إضافة المزيد من خبراء لينوكس إلى شركاتهم خلال الشهور الستة الأولى من 2012.
ويُذكر بأن نظام لينوكس (بحسب إحصائيات أغسطس 2011) يُشغل أكثر من 63% من المخدمات في العالم وأكثر من 91% من أجهزة الكمبيوتر الخارقة supercomputers المستخدمة لأغراض التجارب العلمية، و أكثر من 53% من الهواتف الذكية العاملة بنظام أندرويد وتتبناه كبرى الشركات في العالم مثل غوغل وآمازون وآي بي إم وغيرها.

10000 things all ICS students should do before graduating

It’s Commencement time! So I thought I’d compile a list of 1010 10000 things I believe all ICS students should have done (by  themselves) by the time they get their diplomas. With luck, students have come across some of these in courses. Most likely, that won’t happen, so students need to make time for extra-curricular activities.
This list is inspired by others out there, but, as the title says, it’s about doing, as opposed to knowing or learning. First-hand experience is the absolute best route for exploring the fun things that can be done with computers. Once we make it work and/or surpass the hurdles, we feel empowered (startup companies, anyone?). It also builds up the critical skill of finding things out by oneself.
Here is my list, in no particular order:


0000 – Buy your own domain name.
0001 – Install an Apache web server and configure it in a non-trivial way, e.g. to serve multiple domains.
0010 – Install WordPress and have your own blog. Write blog posts regularly. Write well. Good writing is a critical skill to master in this profession.
0011 – Run your own web site at home or in a hosting company.
0100 – Write at least one complete LAMP web app, preferably two — one where P=PHP, the other where P=Python.
0101 – Have your own [physical or virtual] server on the cloud.
0110 – Install VMWare or equivalent in order to boot up your laptop with more than one OS.
0111 – Configure your home DSL router so that you serve a web site or other kind of server from your home machine / laptop to your friends.
1000 -Use a packet sniffer to learn about the network requests your computer does to your favorite game server.
1001 – Make contributions to an open source project.
1010 – Write an app that uses at least one of the popular Web APIs, like Facebook Connect or one of Google’s.
1011 – Use Google AdSense on your web site, and make money just by virtue of attracting traffic.
1100 – Compile a complicated open source project from scratch, like OpenSim or Matterhorn. (Thanks, Sean!)
1101 – Read works of literature and, besides enjoying the ride, pay close attention to how the author tells the story and makes use of words. Your programs should be as carefully written as those works of art! (Thanks, Beki!)
1110 – Get yourself involved in a software project where requirements are bound to change halfway through — that’s about 0.01% of homework projects and about 99.99% of real world projects, so find one of the latter kind. Finish the project with patience and the ability to take criticism in a constructive way. (Thanks, Lorraine!)
1111 – Write an application using map-reduce. Run it on Google app-engine or amazon EC2. (Thanks, Ian!)